How to Create a Photo Collage for a Wedding Reception
A wedding photo collage can turn a blank reception wall, welcome table, or dessert display into a personal visual feature. It gives guests a way to see the couple’s story through childhood memories, engagement portraits, family photographs, and candid moments from the wedding day.
The strongest collages feel carefully edited rather than crowded. A consistent color palette, thoughtful arrangement, and professional print quality help each photograph contribute to the overall design. Whether you prefer a framed display, a poster-sized arrangement, or individual prints arranged across a wall, planning the project before ordering images will save time and prevent visual clutter.
The Photo Place has served the Youngstown, Ohio area since 1983, helping families and photographers prepare prints, enlargements, wall decor, albums, and personalized photo products. Its online ordering options and in-store assistance make it easier to turn digital files into reception-ready decorations.
Choose A Story For The Display
Start by deciding what the collage should communicate. A timeline might begin with childhood photographs, move through school years and family memories, and end with the engagement or wedding portraits. A family-focused display could combine parents, grandparents, siblings, and close friends. For a reception, a “journey to the wedding” theme is especially easy for guests to follow.
The location of the collage can guide the subject matter. A display near the entrance may introduce the couple and provide a warm welcome. A gallery beside the head table can highlight romantic portraits and engagement photographs, while a photo wall near the dance floor may work better with lively candid images. Select a clear purpose before opening every folder of pictures.
Limit the number of visual ideas in one display. Combining a childhood timeline, a memorial tribute, bridal party portraits, and honeymoon images may make the arrangement difficult to understand. If you have several meaningful themes, create separate, smaller displays with their own color and layout rules.
Gather And Edit Your Images
Collect more photographs than you expect to use, then narrow them down. Look for sharp, well-lit images with emotional variety. Include wide shots that establish a setting, medium portraits that show relationships, and close details such as rings, flowers, invitations, or a handwritten note. This mixture creates rhythm and keeps every print from looking alike.
Avoid choosing photographs solely because they are technically perfect. A slightly imperfect candid image may carry more feeling than a polished portrait. At the same time, inspect each file at full size for blur, severe pixelation, closed eyes, distracting backgrounds, or awkward crops. Images that look fine on a phone may reveal weaknesses when enlarged.
Before sending files for printing, organize them in a dedicated folder and rename them in viewing order. Check that the correct versions are selected, especially when several files have similar names. If you are working with older family photographs, scanning and restoring them can make them blend more naturally with modern digital images.
Plan The Size And Layout
Measure the wall, easel, tabletop, or frame where the wedding collage will appear. Leave breathing room around the edges so the display does not look squeezed into its surroundings. A large reception hall may support a poster or grid of enlargements, while a guest-book table often benefits from a smaller framed arrangement or a tabletop photo panel.
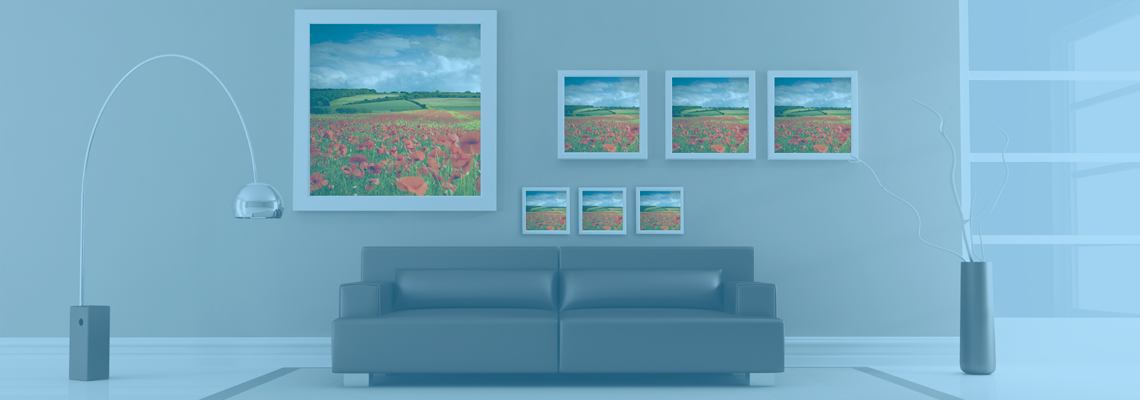
Use a simple visual system. Equal spacing creates a polished gallery effect, while overlapping prints or mixed frame sizes produce a more relaxed scrapbook style. A central portrait can anchor the design, with smaller images radiating around it. If guests will view the collage from several feet away, include a few larger photographs that can be understood at a distance.
| Display Style |
Best Setting |
Suggested Image Mix |
Key Consideration |
| Framed grid |
Entrance or gift table |
Equal-size portraits and family images |
Keep spacing and frame style consistent |
| Large photo poster |
Open wall or welcome area |
Many small images with one focal portrait |
Use high-resolution files |
| Hanging print display |
Barn, loft, or outdoor reception |
Prints clipped to ribbon or wire |
Protect photographs from moisture |
| Tabletop collage |
Guest book or dessert table |
Small prints and detail shots |
Keep the display stable and unobstructed |
| Album-style board |
Beside the head table |
Chronological relationship or wedding images |
Add short captions sparingly |
Create a rough mockup before ordering. You can arrange low-resolution copies in a design program, print a paper sketch, or lay sample images on the floor. A mockup reveals whether the focal image is too small, the colors are uneven, or one side of the composition feels heavier than the other.
Match Printing To The Reception
The print finish affects the appearance and durability of the entire display. Lustre paper reduces glare while retaining attractive color and detail, making it useful for framed photographs and reception areas with overhead lighting. Glossy paper can produce vivid colors, but reflections may interfere with viewing. Matte paper offers a softer appearance and can be a good choice for images with a vintage or artistic style.
Consider the lighting at the venue before selecting a surface. A photograph placed beneath spotlights may benefit from a low-glare finish. Images near windows should be protected from direct sunlight when possible. For a display that will be handled by guests, heavier paper, mounted prints, or a rigid panel can provide better support than lightweight photo paper.
Color consistency matters when photographs come from different cameras, phones, and decades. Professional color correction can balance skin tones, brightness, and contrast across the set. The Photo Place provides digital printing and large-format output for projects that require matching prints in multiple sizes. Its staff can also help determine whether a file is suitable for enlargement.
For a lasting display, frame the finished photographs or choose archival-quality materials when available. If the collage will become home decor after the reception, select sizes and finishes that suit the room where it will eventually hang. Guidance about professional finishing guidance can also help couples make better decisions about color, paper, mounting, and long-term presentation.
Add Captions And Personal Details
Captions can give context to family photographs, especially when guests do not know everyone pictured. Keep wording brief: a name, year, location, or short phrase is usually enough. A timeline might use labels such as “2004,” “First Apartment,” and “The Proposal,” while a family display could identify grandparents or relatives who traveled to attend.
Use typography that is easy to read and consistent with the wedding style. Script fonts may look attractive on invitations but become difficult to read at a distance. Neutral lettering usually works well with colorful photographs, while a subtle accent color can connect captions to the wedding palette.
Personal details should support the images rather than compete with them. Small botanical illustrations, table numbers, ticket stubs, pressed flowers, or copies of handwritten notes can add character. Avoid placing bulky decorations over the photographs or using too many embellishments around already busy images.
Prepare Files And Order Early
Before uploading or delivering files, verify resolution and orientation. A high-resolution original is preferable to a screenshot or compressed social media download. Crop images with the final print size in mind, since a wide photograph may lose important content when converted to a square or portrait format.
Build in time for proofing. Order a small test print when a photograph will be enlarged significantly or when accurate skin tones are important. This gives you a chance to review sharpness, crop, and color under the same lighting where the display will be seen.
A Simple Preparation Checklist
- Select a clear theme and decide where the collage will be displayed.
- Choose a balanced mix of portraits, candid moments, details, and group photographs.
- Check every file for resolution, focus, orientation, and unwanted cropping.
- Measure the display area and create a rough layout before ordering.
- Choose paper, mounting, frames, and finishes that suit the venue and future use.
Place the order early enough to allow for production, shipping, corrections, and assembly. Mail-in film processing may require additional time if you are including photographs from disposable cameras or older negatives. The Photo Place supports film developing, scanning, digital printing, passport photos, professional photography finishing, and personalized photo products, making it possible to coordinate several parts of a wedding display through one lab.
Assemble And Protect The Finished Collage
Lay out all prints in sequence before attaching anything to a wall or board. Use removable mounting materials that will not damage photographs or the venue. For a framed gallery, paper templates can help you mark nail or hook locations accurately. For a tabletop arrangement, use stands or a rigid backing so prints remain upright throughout the reception.
Transport finished pieces in a portfolio case, clean box, or protective sleeve. Keep them away from water, food, direct heat, and tightly packed decorations. If the venue is outdoors, have a backup plan for wind and humidity. A mounted board or framed print is usually safer than loose photographs in an exposed setting.
After the reception, save the digital files and decide which physical pieces should become permanent home decor. Favorite images can be reprinted as enlargements, framed portraits, albums, or wall art. A thoughtfully designed collage can therefore serve two purposes: it welcomes guests on the wedding day and preserves the couple’s story for years afterward.
Bring your selected images and display measurements to The Photo Place online or at its Youngstown-area retail location. With professional printing, mounting, finishing, and personalized product options, your reception collage can move from a folder of digital memories to a polished part of the celebration.