Plan a Themed Photo Shoot for Custom Wall Decor
A themed photo shoot can produce much more than a folder of attractive images. With the right planning, the photographs become a coordinated feature wall, a framed statement piece, or a set of prints that gives a room its personality. The key is to design the shoot around the finished decor rather than choosing images first and hoping they work together later.
This approach suits family portraits, engagement sessions, newborn photography, travel memories, pet portraits, and personal branding. It is especially useful when you want a gallery wall with a clear visual story, or a large-format print that feels intentional instead of oversized.
Australian homes often call for flexible planning. A narrow hallway in a terrace, a sunlit apartment in Melbourne, a coastal living room near Bondi, or a Queenslander with high ceilings will each present different opportunities. Wall colour, available space and natural light should influence the shoot location, styling and print dimensions.
Think of the finished wall as part of the story. A relaxed beach session may lead to soft, spacious images, while a bold studio shoot could suit a dramatic canvas. Whether you are working with a professional photographer or creating the images yourself, a simple visual direction will make custom wall decor easier to design and order.
Define The Story Before Taking Photos
Start by deciding what the display should communicate. “Our family at the beach” is a useful theme, but it can become more specific: early-morning walks along the coast, a summer camping trip, or the everyday character of life with a much-loved dog. A clear theme helps you choose outfits, props, backgrounds and poses without making every image look staged.
Consider the emotional tone as well as the subject. Warm and nostalgic photographs may work well in a bedroom or reading nook, while energetic colour and movement could suit a playroom or creative workspace. For a home in Australia, local elements such as gum trees, weatherboard architecture, surfboards, native flowers or a backyard cricket set can make the display feel personal rather than generic.
Create a short mood board with colours, textures and sample compositions. Include the wall paint, timber tones, upholstery and nearby artwork if possible. A neutral interior might support bright clothing and rich landscape colours, whereas a colourful room may need a restrained palette. Save examples of wide shots, close portraits and detail images so the final collection has variety.
Match The Shoot To The Wall
Measure the wall before planning the session. Record its width, height, nearby furniture and the distance between the proposed artwork and the ceiling, skirting board or door frame. A large panoramic print needs a different composition from a group of square tiles, and an image with a person at the edge may be difficult to crop into a portrait frame.
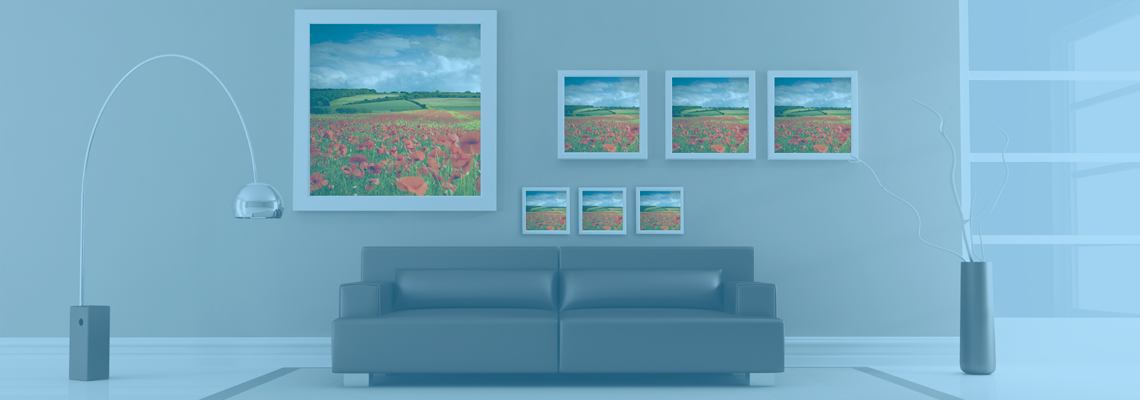
Choose the display format early enough to guide the photographer. A three-print arrangement benefits from related images with consistent orientation, while a gallery wall can accommodate vertical portraits, horizontal scenes and small detail photographs. If you are considering a single statement print, leave useful negative space around the main subject so the image can be cropped without losing important features.
Shoot more than one composition of the key scene. Capture a wide environmental photograph, a medium view and several close details. Take both landscape and portrait versions where practical. This gives you options when selecting frames for a stairwell, narrow hallway or wall above a sofa. Keep important faces, hands and objects away from the outer edges, where trimming can remove them.
Sunlight is another practical consideration. Australian interiors can receive strong afternoon light, particularly in north-facing rooms, and direct sun may gradually affect prints. Choose quality photo paper, acrylic, canvas or framed output suited to the location, and consider UV-protective glazing for valuable or sentimental pieces. A print finishing lab can advise on surfaces and presentation before production.
Plan Styling, Colour And Composition
Clothing should coordinate without looking like a uniform. Select two or three colours that relate to the room and add one contrasting shade for interest. Linen, denim, knits and textured cotton tend to photograph naturally, while tiny checks and narrow stripes can distract at larger sizes. For a family shoot, lay the outfits together before the session and check how they look as a group.
Props should support the theme rather than compete with it. A vintage suitcase for a travel display, a bunch of native foliage for a botanical concept or a well-used cricket bat for a family story can add context. Keep the number of props limited. Wall decor usually looks stronger when the viewer notices the people and atmosphere before noticing the styling.
Build visual rhythm into the shot list. Include a few calm portraits, one or two images with movement, an architectural or landscape frame, and close details such as hands, fabric, flowers or weathered surfaces. These supporting images are valuable in a gallery arrangement because they create breathing space between prominent faces.
If the project involves senior portraits, think beyond a standard head-and-shoulders pose. Personal objects, meaningful locations and varied expressions can create a finished series with genuine character. Guidance on senior portrait finishing can also help when deciding how portraits should be printed, mounted or displayed.
Photograph With Printing In Mind
Camera settings matter, but usable composition matters more for wall art. Photograph at the highest practical resolution and avoid excessive cropping in the editing stage. Large-format prints reveal softness, noise and missed focus more clearly than a phone screen does. Check eyes, fine hair and patterned fabrics at full size before selecting an image for enlargement.
Keep colour consistent throughout the session. Shoot in similar light where possible, use a colour reference if you are working professionally, and edit the whole set together. Mixed white balance can make one image look warm and another look blue, even when the subjects and location are the same. A cohesive set usually feels more polished than a collection of individually dramatic edits.
Ask the photographer to provide both finished files and advice about output. A lab may need a particular colour profile, file type or resolution for different products. Avoid adding heavy sharpening or borders until you know how the image will be printed. The appearance of a file on a bright phone display can differ significantly from a paper print, canvas or framed enlargement.
Proofing is a useful safeguard. Order a small print before committing to a very large piece, especially if the wall is a focal point or the image contains subtle shadows. Professional photographers can also use specialist services for albums, proof sheets and display prints; the professional photographers resources at The Photo Place show the range of finishing options that can support a complete project.
Select Materials And Arrange The Display
Choose the surface according to the room and the character of the photographs. Lustre paper reduces glare and suits detailed portraits, while glossy paper can give vibrant colour a stronger impact behind glass. Canvas softens the presentation and works well for relaxed family or landscape imagery. Metal and acrylic can create a contemporary effect, though their reflective qualities should be considered in rooms with large windows.
Framing connects the artwork to the rest of the home. Timber can reinforce a natural or coastal theme, black frames give a clean graphic edge, and white frames can feel light in a bright interior. In a rental property, lightweight framed prints or a smaller modular arrangement may be easier to install than a single heavy work. For Australian homes exposed to dust, humidity or intense light, easy-clean glazing and sensible placement are practical details.
Before ordering, make paper or cardboard templates in the intended sizes and tape them to the wall. Leave consistent gaps between pieces and view the arrangement from the main entry point. A common gallery-wall mistake is placing artwork too high; the centre of the grouping should generally sit near eye level, adjusted for furniture beneath it.
The same theme can extend beyond wall art into smaller keepsakes. A selected image might become a desk print, calendar or personalised present, allowing the visual story to appear throughout the home. These custom gift ideas can be planned alongside the wall display so the files, colours and cropping remain consistent.
| Display Style |
Best For |
Shooting Priorities |
Practical Considerations |
| Single large print |
A hero portrait, landscape or dramatic scene |
Strong composition, high resolution, clean edges |
Check viewing distance, wall scale and glare |
| Three-print series |
Family milestones, travel or a simple visual story |
Consistent lighting, related poses and varied orientation |
Keep colours and spacing cohesive |
| Gallery wall |
Mixed memories and flexible home decor |
Wide, medium and detail images |
Use templates before drilling or hanging |
| Canvas wrap |
Relaxed family, pet or coastal imagery |
Edge-safe framing and uncluttered backgrounds |
Important details may wrap around the sides |
| Framed fine-art print |
Portraits, botanical studies and detailed scenes |
Accurate colour, texture and tonal range |
Consider glazing, sunlight and dust |
Before sending the order, name the selected files clearly and record their intended sizes and orientation. Check faces, horizon lines, skin tones and the edges of every crop. Then place the smallest proof order first, or print a test at the lab that will produce the final work. Once that proof looks right, approve the full custom wall decor order and reserve time to hang it using the measured templates.