How to create a stunning wall collage with mixed print sizes
A mixed-size wall collage brings movement and personality to a room. Unlike a grid of identical portraits, varied dimensions allow a favourite image to lead while smaller photographs create rhythm around it. The arrangement works best when each print is selected according to the wall, the viewing distance and the story you want the photographs to tell.
For Australian homes, begin with metric dimensions and a clear focal point. A3 images measuring 29.7 by 42 cm and A4 images measuring 21 by 29.7 cm provide useful anchors, while custom sizes such as 30 by 40 cm or 50 by 70 cm can fill awkward spaces without making the display feel mechanical. Measure the available area first, then edit the photographs as one visual group.
Start with the wall and the story
Walk across the room and identify the strongest architectural feature: a sofa, fireplace, dining room or bedhead. The collage should support that feature rather than compete with it. If the sofa occupies most of one wall, place the arrangement above it and keep the lower edge roughly 15 to 25 cm above the backrest.
Next, consider how closely the photographs will be viewed. A hallway arrangement needs a bold focal image and simple spacing, while a lounge wall can support closer inspection and more detailed pictures. This is also where orientation matters. A tall portrait can counterbalance a wide sofa, whereas several landscape prints may look better over a low horizontal furnishing.
Choose images that share a visual idea before choosing their sizes. A family history, a wedding, a journey through Australia or a sequence of portrait studies will feel more intentional than a collection assembled only because each photograph looked good alone. Decide which image carries the main memory and use the others to add context.
Choose a layout that guides the eye
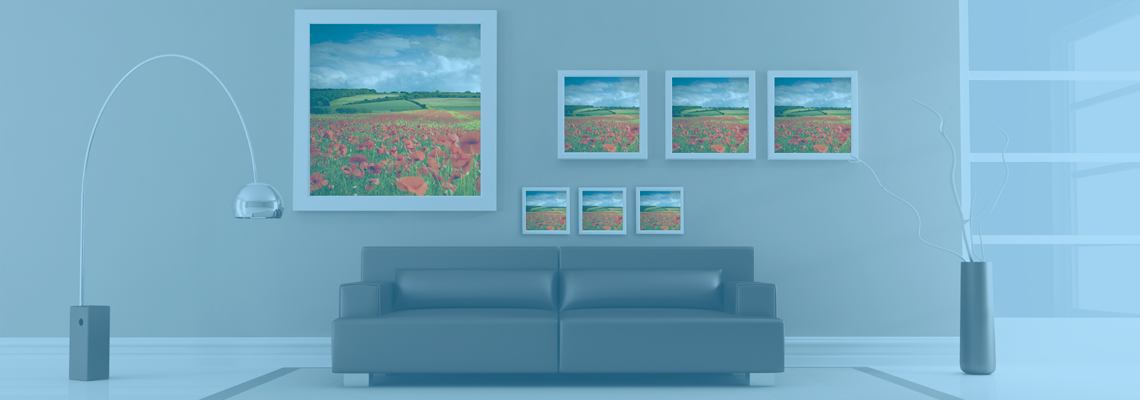
The salon-style arrangement is one of the most effective choices for mixed dimensions. Photographs form an organic cluster with no rigid outer edge, so portrait and landscape formats can sit together naturally. A structured grid also works when every image is aligned precisely, but it demands more consistency in frame width, matting and print proportions.
Plan the gaps before deciding how large the frames should be. Allow approximately 5 to 8 cm between frames, adjusting for the room and the size of the images. Equal gaps create calm and order; varied gaps can make a small display feel crowded. A useful method is to place paper templates of each planned size on the wall, photograph them from your normal viewing position and refine the arrangement before ordering anything.
The photographs should also make sense at a distance. One large print can establish the subject, while smaller images should offer recognisable shapes and colours rather than tiny, indistinct details. Crop carefully around busy backgrounds so each frame has a defined edge. For professional photographers preparing a larger custom order, The Photo Place has supported photo finishing in Youngstown, Ohio since 1983. Its professional print services can coordinate proof sheets, album work and framed outputs so the complete set can be reviewed before installation.
Balance print sizes and visual weight
The largest photograph should usually account for around one-third of the collage’s total visual area. It becomes the anchor, but it should not overwhelm the remaining images. Two medium-sized prints or a group of smaller works can provide enough support without competing with the focal photograph.
For a compact wall, try one of these measured groupings:
- One 30 by 40 cm print with two 20 by 30 cm companions
- One 30 by 40 cm print with two A4 landscape images
- Three A4 images in mixed portrait and landscape formats
For a larger area, use a stronger lead image and build outwards:
- One 50 by 70 cm print above two 30 by 40 cm images
- Two 40 by 50 cm prints with three smaller A4 accents
- One 50 by 70 cm print with two 40 by 50 cm supporting images
- Five A4 prints surrounding one 30 by 40 cm central photograph
The number of prints matters less than their visual weight. Dark, high-contrast or heavily detailed photographs attract more attention than pale, softly textured images, so balance them deliberately. If the largest image is dark and dramatic, place it beside lighter prints to prevent one side of the arrangement from feeling heavy.
The collage can also become part of a meaningful gift. When the display is intended for a romantic occasion, the Valentine gift ideas collection offers inspiration for pairing a personal wall arrangement with a keepsake or smaller printed companion.
Coordinate colour, style and room conditions
Begin with the room rather than with a frame colour. Pull several colours from the wall, furniture and nearby accessories, then decide which photographs should provide the stronger accents. A restrained palette often feels more sophisticated, while one or two contrasting images can add energy. Warm timber, cream walls and soft textiles generally suit earthy prints, whereas cool grey or white interiors can accommodate both monochrome and vivid colour.
Frame styles do not have to match exactly, but they should share a common element. Black, white and natural timber frames can work together when their proportions are controlled by the same mat style. Alternatively, use identical frames and vary the internal mats to keep the size changes clear. Comparing metal print options can help when a clean, contemporary focal point suits a modern room.
Many Australian homes, particularly new builds around Sydney, Melbourne, Brisbane and Perth, feature open-plan living areas with pale plasterboard or rendered masonry walls. These neutral surfaces suit both a tightly arranged grid and a looser salon display. The local homewares market combines national retailers, independent framers and online print services, so it is worth comparing custom dimensions and finishes before committing to an oversized format.
Sunlight and humidity should influence the final materials. Western-facing rooms in Brisbane or Perth can receive intense afternoon light, while coastal homes may experience humidity and salt air. UV-resistant glazing, archival-quality inks and stable frames help protect the photographs. Avoid placing a valuable collage on a wall prone to damp without checking the building materials first.
Prepare, install and finish the arrangement
Mark the wall carefully with a level and pencil before transferring the paper templates. Check the location of studs, pipes or cables, and choose fixings appropriate to the frame weight. The largest prints may require two people to lift safely, while adhesive strips are generally more suitable for lightweight frames. Test the hanging hardware on a spare piece of timber whenever possible.
Confirm every print size, frame dimension, mat colour and crop against the final order. Under the Australian Consumer Law, made under the Competition and Consumer Act 2010, consumer guarantees can apply to commissioned photographic goods and related services. A written quote should record the material, exact dimensions, cropping, colour intention, framing, delivery period and any correction process. Retain the approved proof or reference images so the finished work matches the agreed direction.
Finally, view the collage from several points in the room and make one restrained adjustment rather than continually rearranging it. Check that the focal photograph reads first, the surrounding images feel balanced and the gaps remain comfortable. The practical takeaway is to measure the wall, select one dominant print and build the remaining sizes around it before ordering, creating a cohesive display without unnecessary trial and error.