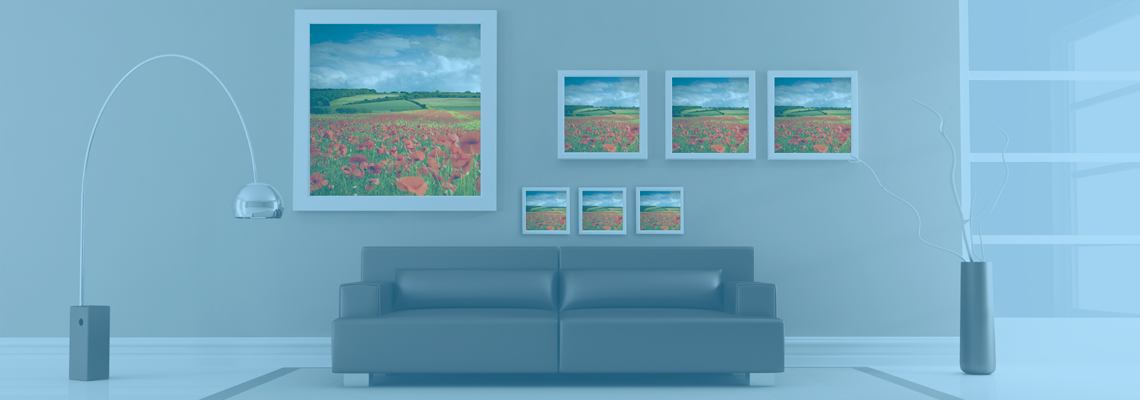
How to frame a diptych or triptych for a gallery effect
How to frame a diptych or triptych for a gallery effect begins with treating the panels as one composition rather than a row of unrelated pictures. A diptych contains two images, while a triptych contains three. The photographs might be separate moments, complementary details or portions of a wider scene, but scale, alignment and spacing determine whether the group reads as a unified artwork.
The frame establishes that unity. Matching profiles, consistent mat borders and an intentional gap create rhythm, while the subject matter gives the eye a path across the panels. The strongest result is not the one with the most decorative moulding; it is the one in which the physical construction quietly supports the story held by the photographs.
For Australian readers, the room and its conditions deserve early attention. Sydney homes often receive strong coastal daylight, Melbourne’s narrow entry halls and rendered walls reward a restrained profile, and Brisbane’s humidity calls for stable, archival materials. Australian print and framing markets also use metric A-series sizes, making A2 or A3 useful starting dimensions for multi-panel work.
Plan the relationship between photographs
Begin by defining what the set should communicate. A diptych may contrast two places or create a visual dialogue between detail and landscape. A triptych often works best with a central anchor, two supporting images and a deliberate left-to-right narrative. Write down the intended order, because reversing side panels can alter the balance even when each photograph remains unchanged.
Choose one visual idea to carry across the set. Repeated colours, recurring shapes or a continuous horizon can connect otherwise separate images. Avoid forcing several unrelated styles into one frame; a common palette or subject is more reliable than a collection of technically polished but conflicting pictures.
Decide the orientation before choosing mouldings. A horizontal triptych suits broad walls above a sofa, while a vertical arrangement can suit a stairwell or a narrower section of an open-plan room. Measure the available wall rather than relying on a standard frame size, as Australian homes range from compact apartments to open-plan family houses.
Build matching panels and mounts
The outer dimensions of every frame should match, even when the visible photographs have different shapes. If one panel is larger, the repeated reveal becomes inconsistent and the set loses its gallery rhythm. Check the outside width and height of each finished frame, not just the paper dimensions, because the mount and moulding contribute to the total.
Choose a single moulding for the whole arrangement. Black, white, brushed metal or natural timber can all work, and timber frames are especially familiar in Australian interiors. The finish should coordinate with the room without competing with the photographs; a narrow profile often gives a multi-panel composition a cleaner, more contemporary appearance.
Decide whether the photographs will be floated, matted or held directly behind glazing. A generous mat border creates visual breathing space, while a float mount gives a print a crisp, shadowed edge. A practical reference on choosing the right mount can help with that decision, particularly when mixing portrait, landscape and panoramic images.
Join the artwork with the right hardware
For a true hinged diptych or triptych, small museum hinges let the framed panels open slightly like the pages of a book. This approach suits images meant to be explored over time and keeps the work physically connected. It requires careful spacing and a secure wall fixing, since the hinges should carry the panels’ weight without pulling them out of square.
If separate framed panels will hang beside one another, their alignment still matters. Use the same reference point for the top edges, check each panel with a level and leave a deliberate gap between frames. A narrow consistent reveal commonly works better than an arbitrary large space, although wider gaps suit bold landscapes and architectural subjects.
Professional photographers can test the sequence on proof sheets before committing to a finished set. The Photo Place in Youngstown, Ohio, has provided mail-in film processing, digital and large-format printing, proof sheets, albums and framed output since 1983. That production step helps reveal whether one image is too dominant or whether the triptych needs a stronger centre panel.
Control reflections, colour and depth
Glazing protects the photographs while also creating a surface that can catch glare. UV-filtering acrylic is often practical for large or frequently handled works because it is lighter and less prone to breakage than glass. Museum glass offers a more polished, low-reflection finish, but its effectiveness depends on lighting and viewing angle as well as the product itself.
Keep the mats and backing materials consistent across the set. Acid-free mat board, a rigid archival backing and stable spacers help each panel sit at the same depth. In Brisbane and other humid areas, good sealing and climate-controlled storage matter, while Sydney sunlight makes UV control and fade-resistant inks important considerations.
View the glazing from the position most visitors will occupy. A frame that looks crisp straight on may show reflections from a window, downlight or opposite wall. Slightly tilting a glass-covered piece or using anti-reflective glazing can solve the issue without weakening the design; adding more layers of mat or ornate moulding rarely does.
Create a wider gallery composition
A two- or three-panel work can become the centre of a broader gallery wall without competing with neighbouring frames. Repeat one framing element elsewhere, such as the same mat colour or moulding finish, while varying the sizes. Keep the busiest section close to the diptych or triptych so the eye has a clear place to begin and a logical place to rest.
Balance the arrangement around the multi-panel work rather than treating it as an isolated object. In a Melbourne apartment, for example, a narrow hallway may need a compact vertical set with generous wall space around it; in a Sydney family room, a horizontal grouping can balance built-in cabinetry or a large window. In Brisbane, leave airflow around the wall so moisture is not trapped behind the panels.
The same continuity and careful finishing apply to commissioned imagery. The Photo Place’s guide to a themed photo calendar shows how a set of related images becomes a cohesive product through consistent colour, sizing and presentation.
Hang and light the finished piece
Mark the centre and outer edges before drilling. Check the wall for studs or suitable anchors, especially in Australian brick veneer, timber-framed and rendered homes, where a generic plaster plug may not hold securely. Hang the centre panel first in a triptych, fit the side panels to it, then use spacers or a level to confirm that all frames share the same top line.
Treat lighting as part of the gallery effect. Directional light from above and to the side gives depth to the frames, but harsh direct sun can create glare and accelerate fading. LED lighting with a high colour rendering index gives a more faithful presentation than a cool fluorescent source and helps reveal the subtle tones within each photograph.
Leave enough distance from furniture and architectural features for the arrangement to breathe. A frame touching a skirting board or crowding a curtain can make an otherwise balanced composition feel accidental. For a hinged set, allow the panels to open without striking a nearby wall, door or piece of furniture.
Make the final choice feel cohesive
Before signing off, place the photographs on the floor or table in their intended order and view them from a distance. Check the colour relationships, the pace from one image to the next and the visual weight of the centre. In a triptych, the middle image should usually hold the story, yet it should not overwhelm the outer panels. For a diptych, the pair needs enough contrast to remain interesting and enough unity to stay connected.
Then inspect the finished frames as a single silhouette. The moulding, mat borders, glazing and gaps should repeat with precision, and every photograph should appear to occupy the same visual plane. Small inconsistencies are easier to correct before hanging than after the set is on the wall.
What should remain in the viewer’s mind is a deliberate rhythm: two or three photographs, joined by proportion, spacing and a frame that gives each image a distinct place within one coherent work.